1. Introduction to Star Technology Modpack
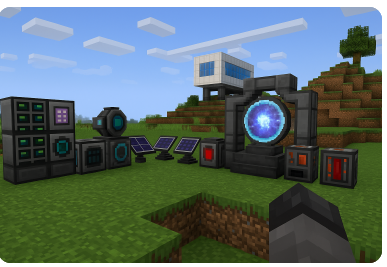
The Star Technology modpack is a custom collection of Minecraft mods, primarily focused on technological progression, futuristic automation, and exploration. It blends industry-style machines, space-age advancements, and powerful tools to give players an immersive high-tech gameplay experience.
Whether you’re a solo player or want to explore this universe with friends, setting up a dedicated server is the best way to play uninterrupted. This guide will teach you exactly how to run Star Technology modpack server Minecraft, even if you’re not a tech expert.
2. Preparing Your Environment
Before diving into the installation, it’s essential to ensure your system is ready to handle the modpack’s demands. The Star Technology modpack, like most modded Minecraft experiences, is resource-intensive.
Recommended System Requirements:
| Component | Minimum | Recommended |
|---|---|---|
| CPU | Intel i5 or equivalent | Intel i7 / Ryzen 5 or better |
| RAM | 6 GB (Server only) | 8–12 GB (Server + Gameplay) |
| Storage | 5 GB SSD | 10+ GB SSD |
| Java Version | Java 17 | Java 17 (Latest Patch) |
To start, ensure that Java 17 is installed, as it’s required for Minecraft 1.20.1 (the version Star Technology usually runs on). You can download it from the official Oracle or OpenJDK websites.
You’ll also need a text editor like Notepad++ and optionally, an FTP tool like FileZilla if you’re using remote server hosting.
3. Downloading the Server Files
To get started with running the modpack server, you first need to download the official server files.
- Visit the Star Technology page on CurseForge.
- Scroll down to the “Files” section and look for a version marked as “Server Files.”
- Download and extract the archive into a new folder on your desktop or server drive.
Make sure all files including the run.bat, mods, and config folders are present. These are essential for running the server properly.
4. Configuring the Server
After extracting the server files, you’ll need to configure them for your specific environment.
Editing the run.bat File (Windows) or start.sh (Linux/Mac):
Open the file in a text editor and make sure the filename of the Forge JAR matches the one in your directory. For example:
nginxCopyEditjava -Xmx6G -Xms4G -jar forge-1.20.1-47.3.10.jar nogui
-Xmxis the maximum memory allocation (6GB recommended).-Xmsis the initial memory allocation (4GB is sufficient to start).
Customizing server.properties:
You can personalize gameplay settings in the server.properties file. Some key values to adjust:
| Property | Suggested Value | Description |
|---|---|---|
level-type | default or biomesoplenty | World generation settings |
difficulty | normal or hard | Game difficulty |
pvp | true or false | Enable or disable PvP |
motd | Star Tech Server | Message shown in the server list |
Save all changes before launching.
5. Installing Forge
The Star Technology modpack relies on Forge, the most widely used mod loader for Minecraft.
To install Forge:
- Download the specific Forge version from https://files.minecraftforge.net.
- Run the installer and select “Install server.”
- Point the installer to the folder containing your server files.
- Replace or merge any existing Forge JARs with the new one.
Verify that the correct Forge JAR name is referenced in your startup script (run.bat or start.sh).
6. Uploading Server Files to Hosting Provider (Optional)
If you prefer not to host locally, consider a Minecraft hosting service such as ScalaCube, Apex Hosting, or StickyPiston.
Steps to Upload:
- Purchase a hosting plan with sufficient RAM (at least 6–8 GB).
- Use the control panel to stop any running server.
- Connect to the server’s file directory via FTP (using FileZilla).
- Delete any default files and upload your extracted Star Technology server files.
- Set the correct Forge JAR as the startup file in the control panel.
Once uploaded, start the server from the host dashboard.
7. Running the Server Locally
To run your server on your computer:
- Double-click the
run.batfile on Windows or runstart.shin a Linux terminal. - Wait for the console to complete setup (may take a few minutes on first launch).
- Accept the EULA by opening
eula.txtand changingfalsetotrue. - Relaunch the script.
Watch the console log for any errors or missing mod warnings. Once the server says Done, it’s ready for connections.
8. Connecting to the Server
To join your server:
- Local Host: Use
localhostas the IP in your Minecraft client. - Friends on Same Network: Use your local IPv4 address.
- Public Server: Set up port forwarding on your router (default port:
25565).
Ensure everyone has the same modpack version installed through CurseForge or ATLauncher.
9. Troubleshooting Common Issues
Even experienced players run into issues. Here are common problems and solutions:
| Problem | Solution |
|---|---|
| Server not starting | Check Forge JAR name, EULA file, and available RAM |
| Mod mismatch | Ensure all players use the exact same modpack version |
| Performance lag | Allocate more RAM, reduce view distance, or upgrade hardware |
| Port not open | Verify port forwarding settings and firewall permissions |
Keep server logs handy for identifying crashes or conflicts.
10. Maintaining and Updating the Server
Routine maintenance is key to a smooth gameplay experience:
- Back Up Data: Copy the
worldfolder regularly to prevent data loss. - Update Mods: Occasionally check for mod updates on CurseForge.
- Manage Players: Use permission plugins or whitelist settings to control access.
- Monitor Performance: Keep an eye on CPU/RAM usage and consider upgrading if needed.
✅ Final Thoughts
Now that you’ve learned how to run Star Technology modpack server Minecraft, you’re ready to dive into a futuristic modded world with your friends or community. Whether you host locally or use a hosting provider, this guide provides everything needed for a stable, optimized experience.
Related Articles
Andhra Law Times – Legacy, Editions, and Importance in Indian Legal Journalism
Redpoint County Mutual Insurance Company: Full Guide to Services, Reviews & Claims
MyWebInsurance.com Home Insurance – Full Guide to Affordable & Smart Coverage
Amigo Insurance: Honest Review of Coverage, Claims & Customer Experience